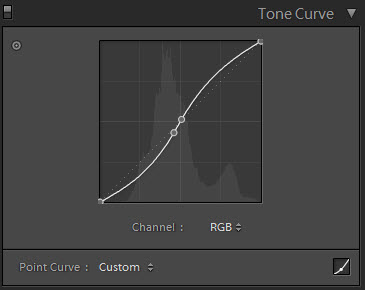
I’m a big fan of Lightroom, and use it as my RAW file converter. Adobe Camera Raw is essentially the same, but there is one small difference which, for me, is a reason I prefer Lightroom over ACR. That difference lies in how the two programs allow the user to adjust contrast.
Both Lightroom and ACR incorporate a contrast slider, and in both programs the slider does exactly the same thing. Watch the image histogram as you drag the slider left or right, and you’ll see both ends of the histogram move simultaneously, expanding or contracting the histogram. OK, no difference here between LR and ACR.
But go to the Tone Curve, which I prefer to use, and the two programs operate slightly differently. Both Lightroom and ACR offer two views of the Tone Curve, a Point Curve (where you place points on the curve and move those points), and a Parametric Curve (where the tone curve is divided into sections and adjustments affect that region). The Targeted Adjust Tool — which allows you to mouse over your image, click on a spot, and drag to adjust — is available in both Lightroom and ACR. In the Parametric Curve, in both programs, one point can be set on the curve. You cannot set two points close to each other (for example, two points in the highlights sections, or two points in the shadows). But go to the Point Curve, and here lies the difference: you cannot use the Targeted Adjustment Tool in ACR when in the Point Curve. Try to do so, and it affects the Parametric Curve. In contrast, Lightroom allows using the tool in the Point Curve. As you mouse over your image using the tool, a “ball” appears on the curve indicating where the point under the tool will fall on the curve, so you can set multiple points exactly. ACR does allow placing multiple points on the curve, but it does not indicate where any one tonal value falls on the curve; you’re guessing at the precise position on the curve.


One Comment
Is this covered in your new book that is coming out in March??